

Do you’ve gotten a webcam? Are you attempting to determine how to record video footage with it on your Linux PC? Unsure how to take footage with it? We may help! Comply with together with this information as we present you ways to record your webcam on Linux!

Word: for this information to work, you have to a webcam that’s suitable with the Linux platform. Guarantee you might be utilizing a webcam that works with Linux by putting in the right drivers for your Linux distribution, or by buying one which has open-source drivers included within the Linux kernel.
Putting in Cheese on Linux
To record webcam footage on Linux, you have to to set up a webcam utility. There are numerous sorts of webcam utilities on Linux. Nonetheless, on this information, we shall be focusing on the Cheese software.
Why Cheese? It’s the most dependable out of all the different webcam apps on Linux. Moreover, it’s the most fashionable and probably the most extensively used of all the opposite apps accessible. No different webcam app is as in style as Cheese on Linux, or as simple to set up.
To begin the set up of the Cheese webcam app on your Linux PC, begin by launching a terminal window on the Linux desktop. To launch a terminal window press Ctrl + Alt + T or Ctrl + Shift + T on the keyboard. Alternatively, seek for “Terminal” within the app menu.
As soon as the terminal window is open and prepared to use on the Linux desktop, observe the command-line directions outlined beneath that correspond with the Linux OS, you utilize to get every thing going.
Word: you will have Cheese put in on your Linux PC already. To examine to see if you have already got the app put in, open up your app menu, and seek for “Cheese.” Should you can’t discover it, you need to observe the set up directions on this information to use the app.
Ubuntu
On Ubuntu Linux, it’s potential to rapidly set up the Cheese webcam software with the next Apt command beneath.
sudo apt set up cheese
Debian
Are you utilizing Debian Linux? Want to get the newest Cheese app up and working? Use the next Apt-get command beneath in a terminal window.
sudo apt-get set up cheese
Arch Linux
These on Arch Linux can rapidly get the Cheese webcam utility up and working by executing the next Pacman set up command in a terminal window.
sudo pacman -S cheese
Fedora
Fedora Linux customers have entry to the Cheese webcam app through the Dnf set up command. To get it working on your system, enter the command beneath in a terminal window.
sudo dnf set up cheese
OpenSUSE
Are you on OpenSUSE Linux? Want entry to the Cheese webcam program on your PC? Use the Zypper command beneath in a terminal window to get it working.
sudo zypper set up cheese
Flatpak
Many Linux customers might not know this, however the Cheese webcam software is accessible as a Flatpak software. So, even if you happen to’re utilizing an obscure Linux distribution, you’ll all the time have entry to Cheese as long as your distribution helps Flatpak.
To begin the set up, observe the information right here to arrange the Flatpak runtime. Then, enter the instructions beneath to get the app working.
flatpak remote-add --if-not-exists flathub

flatpak set up flathub org.gnome.Cheese
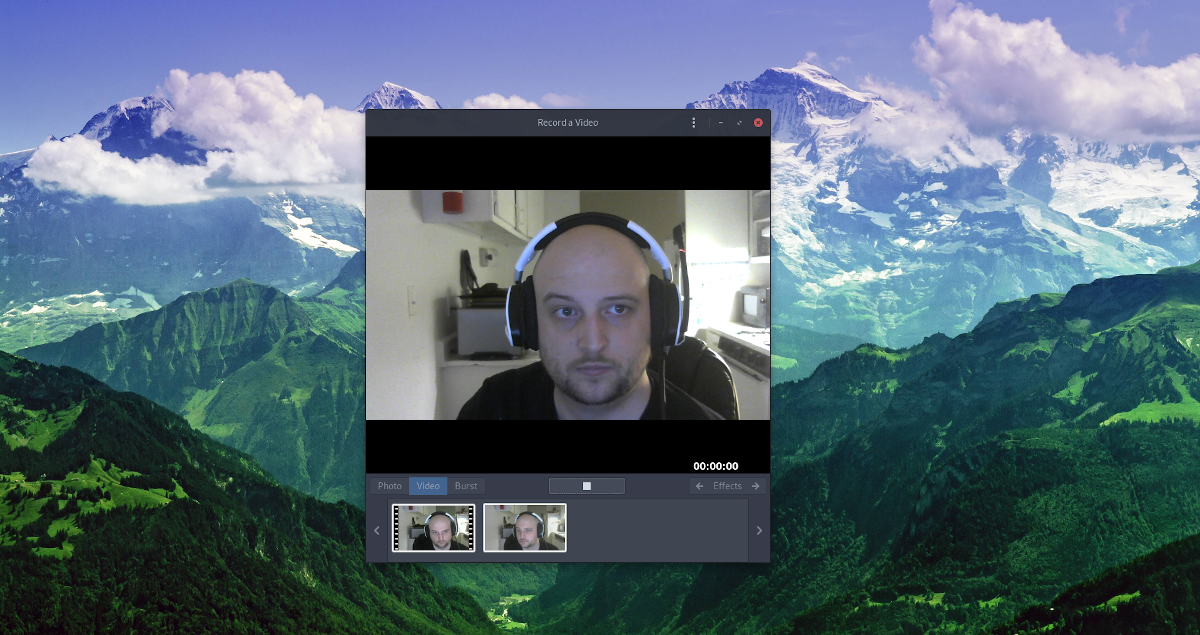
Recording video with Cheese
Recording video footage with Cheese is easy thanks to the simple person interface it has. To begin the recording course of, launch the appliance on your Linux desktop. You possibly can launch it by trying to find “Cheese” within the app menu.
As soon as the Cheese software is open, guarantee your webcam is being captured. You’ll know that your digicam is being captured if you happen to see your self on the display screen. If your digicam is just not being captured, unplug the gadget from your PC, and shut Cheese. Then, plug it again in and re-launch the app.
Once you’ve confirmed, Cheese is capturing your webcam, observe the step-by-step directions down beneath to find out how to record video from your webcam utilizing Cheese on Linux.
Step 1: Find the “Video” part of the Cheese app and click on on it with the mouse. Choosing this feature will take Cheese into video mode. On some installations, you could not want to choose “Video,” because it opens there by default.
Step 2: In video mode, your digicam needs to be displaying a reside feed within the preview window. To verify the standard of the digicam, watch your self in Cheese, and transfer round a little bit bit to verify that the app is capturing video appropriately.
Step 3: Discover the webcam icon and click on it with the mouse. It’ll immediately begin recording. It’ll record audio from the default microphone on your Linux PC.


Step 4: Once you’ve completed recording your webcam and wish to finish the recording, click on on the cease button.
You’ll find a way to entry all webcam recordings within the “Videos” folder of your house listing.
Taking footage with Cheese
Do you know that it’s potential to take footage with your webcam? Right here’s how to do it.
Step 1: Discover the “Photo” part in Cheese, and click on on it with the mouse.
Step 2: After deciding on the “Photo” choice, Cheese will enter image mode. From right here, choose the webcam icon to take an image.


Photos taken with Cheese are saved to the “Photo” folder of your house listing.


