

Each Linux working system has a variety of fonts preinstalled. Sadly, there is no such thing as a built-in approach to preview these fonts, and customers have to resort to viewing them by means of varied unofficial apps, a lot of that are complicated to use.
For those who’re sick of utilizing complicated instruments to preview fonts, try Fontpreview. It’s a command-line app that routinely detects what fonts are put in and allows you to simply view them in a pleasant text-based UI.
On this information, we’ll go over how to arrange the Fontpreview program on Linux. We’ll additionally go over how to use it to view all of the fonts on your system.

Putting in Fontpreview on Linux
Getting the Fontpreview utility put in on your Linux PC requires downloading the program from GitHub, as it isn’t in any mainstream software program repositories. To start out the set up course of, open up a terminal window by urgent Ctrl + Alt + T or Ctrl + Shift + T on the keyboard. Then, observe the step-by-step directions under to get the app working.
Notice: Utilizing Arch Linux and don’t really feel like manually putting in the program? Level your favourite AUR helper at the fontpreview package to get it working.
Step 1: Step one in putting in the Fontpreview app on Linux is to set up the dependencies obligatory to run the program efficiently. At present, you want Fontpreview requires Imagemagick, xdotool, fzf, and sxiv.
Ubuntu (19.10+)
sudo apt set up imagemagick xdotool fzf sxiv
Debian (10 and Sid)
sudo apt-get set up imagemagick xdotool fzf sxiv
Arch Linux
sudo pacman -S imagemagick xdotool fzfsxiv
Fedora
sudo dnf set up imagemagick xdotool fzf sxiv
OpenSUSE
sudo zypper set up imagemagick xdotool fzf sxiv
Generic Linux
For those who’re a Linux consumer and also you’re utilizing a distribution that isn’t one among the mainstream ones (Ubuntu, Debian, Fedora, and many others.), you have to to obtain the dependencies manually. Head over to the challenge’s GitHub. It outlines the actual bundle names and might aide you in the setup course of.
Step 2: After putting in the Imagemagick dependency, it’s time to obtain the newest launch of Fontpreview to your Linux PC. Utilizing the wget command, seize the software program.
Notice: Interplay with ZIP archive information requires the Unzip program. In case your Linux system doesn’t have Unzip put in (for some motive), you’ll find data on how to set up it by clicking here.
wget
Step 3: As soon as the grasp.zip file is finished downloading, you should have all of the knowledge obligatory to set up Fontpreview on your Linux PC. Nonetheless, the software program can’t be used till it’s extracted from the grasp.zip file. To extract grasp.zip use the unzip command under.
unzip grasp.zip
Step 4: With the grasp.zip file extracted, you will note a folder with the identify of the app in your own home listing. To entry this new folder, make use of the following CD command.
cd fontpreview-master
Check out the contents of the folder by executing the ls command.
ls
Step 5: Change the fontpreview binary file’s permissions in order that your Linux PC can execute it. To alter the permissions, use the chmod command under.
sudo chmod +x fontpreview
Step 6: Set up the fontpreview binary file into the /usr/bin listing. Putting the file right here will enable you to name it wherever in the terminal as a daily program.
For those who’re not snug inserting the fontpreview binary file in /usr/bin, be at liberty to set it in a customized location and add it to your $PATH for those who’re a Linux professional.
sudo mv fontpreview /usr/bin
With the fontpreview binary in the /usr/bin listing on your Linux PC, it is possible for you to to entry the Fontpreview program at any time by executing the command under.
fontpreview
Moreover, entry data on the program by executing:


fontpreview --help
Previewing Linux fonts
Now that the fontpreview app is about up on your Linux PC, previewing put in fonts is feasible. To view varied fonts on your system, observe the step-by-step directions under.
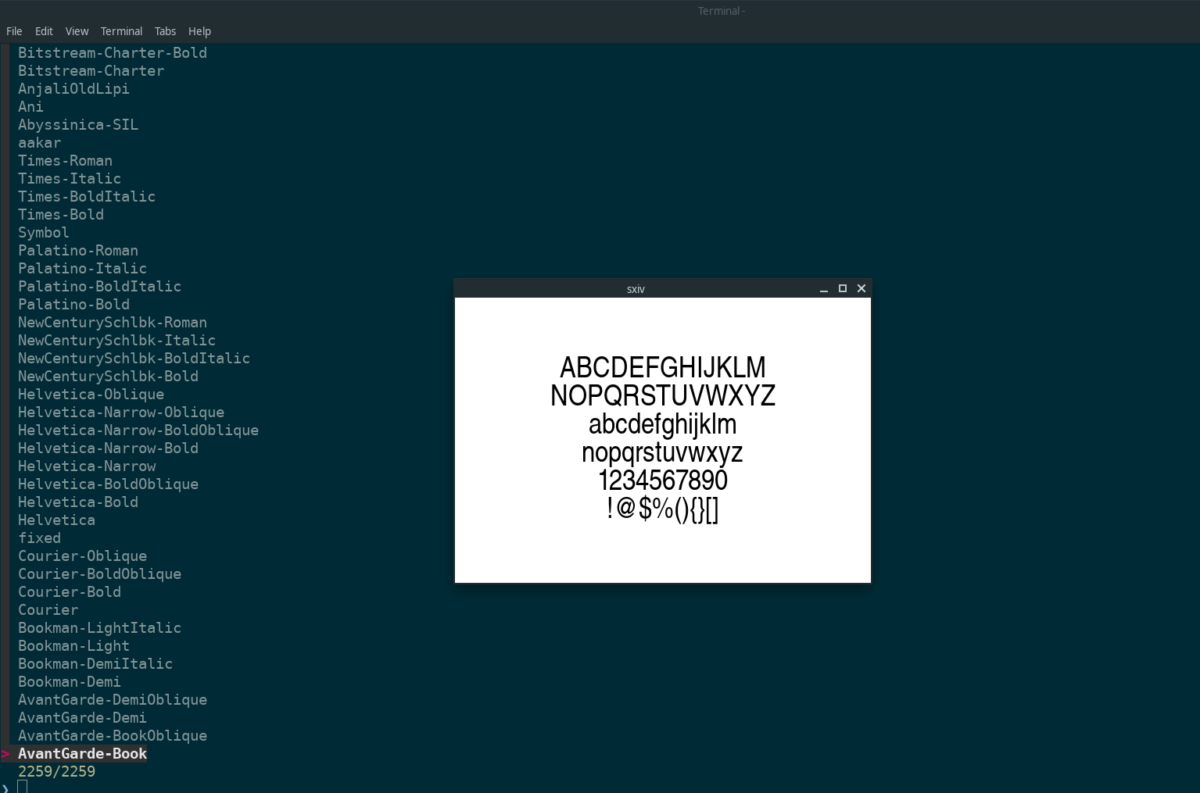
Step 1: Execute the fontpreview command in any open terminal window. This command will convey up the Fontpreview UI and likewise listing all put in fonts on the system.


fontpreview
Step 2: Utilizing the Up/Down Arrow keys on the keyboard, search for a font you desire to to preview on the system. When you’ve discovered the font to preview, press the Enter key. Fontpreview will then launch a show instrument to present you the font.


Looking out
The fontpreview app doesn’t simply present you fonts in an inventory to decide from. You’ll additionally have the opportunity to get hold of the identify of any font to preview it. To run a search on any font on your Linux system, do the following.
Step 1: Launch fontpreview in the terminal.
fontpreview
Step 2: Begin typing out the identify of the font you desire to to preview in the app. It ought to immediately present up in the search outcomes.


Step 3: Choose the font in the listing of search outcomes with the Up/Down Arrow keys and press Enter to view it.


