

In Microsoft Phrase, Excel, PowerPoint, and so forth., you may simply change or modify the default native file location. Nevertheless, in order for you users to make use of native storage as an alternative of a personal site, you may allow this setting. Right here is how one can forestall users from setting personal websites as the default location in Office apps. You can also make this variation with the assistance of the Native Group Coverage Editor and the Registry Editor.
How you can forestall users from setting personal site as default location in Office
To stop users from setting personal site as the default location in Office apps, observe these steps:
- Seek for gpedit.msc in the Taskbar search field.
- Click on the search outcome.
- Navigate to Shared Workspace in Consumer Configuration.
- Double-click on the Disable person from setting personal site as default location setting.
- Select the Enabled choice.
- Click on the OK button.
To be taught extra about these steps, proceed studying.
To get began, it’s essential to open the Native Group Coverage Editor in your pc. For that, you may seek for gpedit.msc in the Taskbar search field and click on on the person search outcome.
As soon as it’s opened in your pc, navigate to the next path:
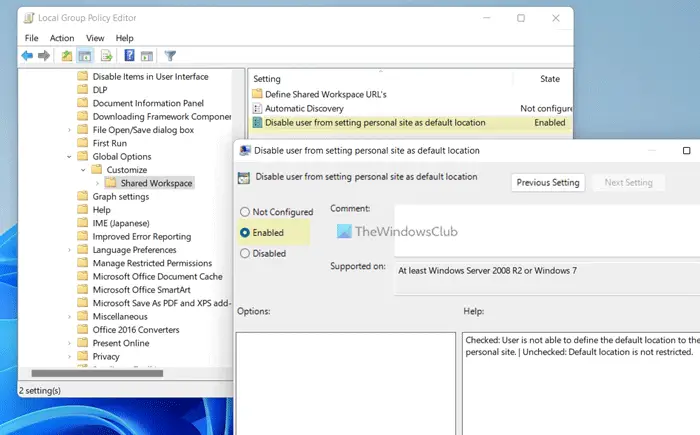
Consumer Configuration > Administrative Templates > Microsoft Office 2016 > World Choices > Customise > Shared Workspace
Right here you’ll find a setting named Disable person from setting personal site as default location. You could double-click on this setting and select the Enabled choice.
Click on the OK button to save lots of the change and restart the Office apps to use the change.
Observe: If you wish to permit users to set a personal site as the default location in Office apps, you must open the identical setting and select the Not Configured choice. Alternatively, you can too choose the Disabled choice as properly.
Permit or block users from setting personal site as default location in Office apps
To permit or block users from setting personal site as the default location in Office apps, observe these steps:
- Press Win+R to open the Run immediate.
- Kind regedit > click on the OK button > click on the Sure button.
- Navigate to workplace > 16.0in HKCU.
- Proper-click on 0 > New > Keyand title it as frequent.
- Repeat these steps and title the important thing as the portal.
- Proper-click on portal > New > DWORD (32-bit) Worth.
- Set the title as disablesetpersonalsite.
- Double-click on it to set the Worth information as 1.
- Click on the OK button.
- Restart your pc.
Let’s take a look at these steps in element.
First, press Win+R > sort regedit > click on the OK button, and click on the Sure button to open the Registry Editor in your pc.
As soon as the Registry Editor is opened, navigate to this path:
HKEY_CURRENT_USERSoftwarePoliciesMicrosoftoffice16.0
Proper-click on 16.0 > New > Key and title it as frequent.


Then, repeat the identical steps to create a key below frequent and set the title as portal. Following that, right-click on portal > New > DWORD (32-bit) Worth and name it disablesetpersonalsite.

Double-click on the disablesetpersonalsite and set the Worth information as 1.

Click on the OK button to save lots of the change. Lastly, restart your pc.
Observe: If you wish to revert to the unique setting, you must delete the REG_DWORD worth. For that, right-click on the disablesetpersonalsite and choose the Delete choice. Lastly, click on the Sure button.
How do I modify the default save location in Office 365?
To change the default save location in Office 365, you must open the Choices panel first. Then, go to the Save tab and discover the Default native file location setting. Following that, click on the Browse button and select a location you wish to set as the default one. Lastly, click on the OK button to save lots of the change.
How do I block OneDrive from inside Microsoft 365 apps?
To OneDrive from inside Microsoft 365 apps, you must use the Native Group Coverage Editor. For that, go to Microsoft Office 2016 > Miscellaneous and double-click on the Present OneDrive Signal In setting. Then, select the Disabled choice. Lastly, click on the OK button.
That’s all! Hope this information helped.
Learn: How you can collapse the Ribbon mechanically in Phrase, Excel, PowerPoint.


