

For those who do a number of growth or code auditing on Linux, looking out via code to seek out delicate modifications may be very tedious. Fortunately, there’s a simple resolution: simply use Meld. With Meld you’ll be able to rapidly detect modifications in recordsdata, directories and extra.
Set up Meld
To use Meld, it’s worthwhile to be operating both Ubuntu, Debian, Arch Linux, Fedora, OpenSUSE or a Linux OS that may set up Flatpaks.
Ubuntu
sudo apt set up meld
Debian
sudo apt-get set up meld
Arch Linux
Getting the Meld utility on Arch Linux isn’t doable with out enabling the “Extra” software program supply. This repository is commonly shut off by default on many Arch installations, because it has software program not essential to nearly all of techniques.
Turning on the Further software program supply is finished by making a small edit to the Pacman configuration file. To do that, open up a terminal and achieve root entry with the su command. For those who select to not enable su, a sudo -s will suffice.
su -
or
sudo -s
Utilizing your root entry, open up the Pacman configuration file within the Nano textual content modifying utility.
nano /and so forth/pacman.conf
In Nano, use the down arrow keys to navigate down the file Seek for the “Extra” entry. There are three strains to the “Extra” repo. Take away all # symbols from in entrance of the strains, and press Ctrl + O to avoid wasting your modifications. Exit the editor by urgent Ctrl + X, and re-sync the Arch packaging device.
pacman -Syy
Operating a re-sync downloads new repository data for already arrange software program repos. It’ll additionally obtain the bundle listings and arrange Further. When that’s taken care of, it’s secure to put in the Meld utility to Arch Linux.
pacman -S meld
Fedora
sudo dnf set up meld
OpenSUSE
sudo zypper set up meld
Generic Linux by way of Flatpak
Meld is part of the Gnome undertaking, so the software program finds its means on nearly each Linux distribution within the type of a local binary bundle. Nonetheless, for those who’re on a Linux distribution that for some motive doesn’t have entry to a local installer, the following smartest thing is to get the app by way of Flatpak.
Earlier than putting in Meld by way of Flathub, observe our information to discover ways to arrange the Flatpak packaging system in your Linux PC. Once you’ve received Flatpaks working, open up a terminal and enter the next instructions to put in Meld.
flatpak remote-add --if-not-exists flathub
flatpak set up flathub org.gnome.meld
After operating the instructions above to put in Meld, launch it for the primary time with:
flatpak run org.gnome.meld
Use Meld To Compare Files
Meld’s major goal is to seek out delicate variations in textual content, and it may detect modifications in a short time. Higher nonetheless, Meld has assist for plenty of several types of textual content and file varieties, making certain that it doesn’t matter what, your modifications are detectable.
For those who’re undecided methods to examine for “differences” in recordsdata within the Meld utility, observe these steps.
Step 1: In the Meld start-up web page, search for “file comparison”. Beneath the “file comparison” choice, you’ll discover a button that claims “none”. Click on it and use it to browse for the primary file in your comparability.
Step 2: Loading up the primary file into meld will rework the app right into a split-screen mode. On the left aspect of the split-screen, you’ll see the primary file you’ve added. On the best, you’ll see a clean web page. Click on the title of the web page and cargo up the file you wish to evaluate with the one from earlier.


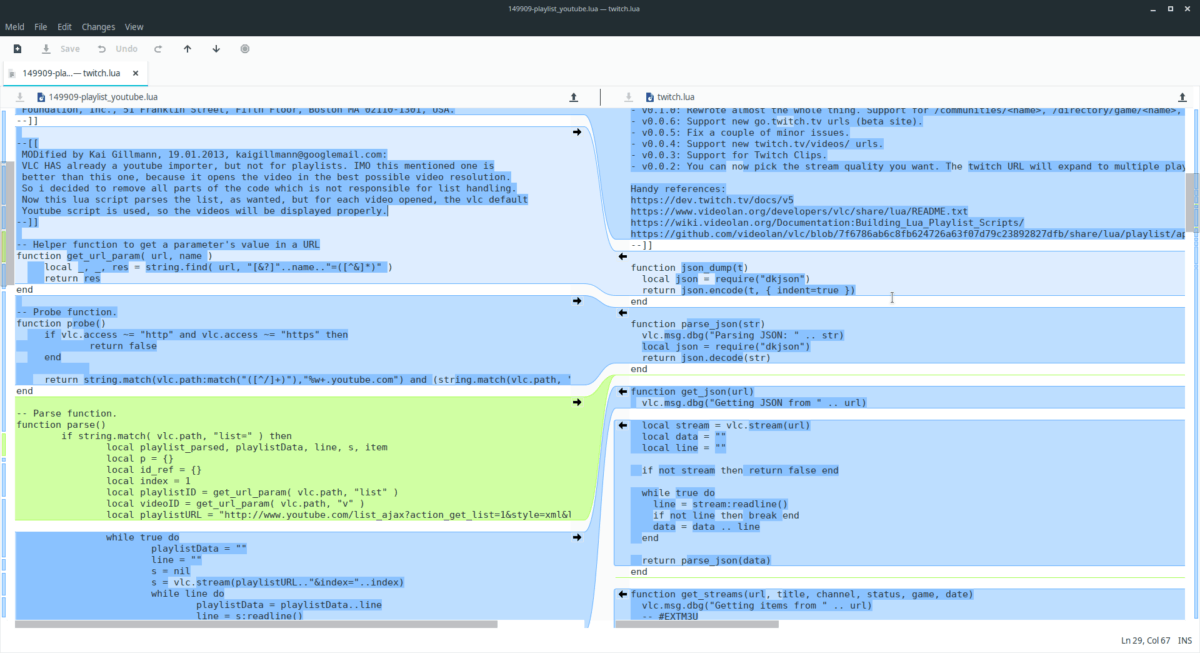
Step 3: When the 2 recordsdata end loading into Meld, it’ll spotlight modifications it sees within the textual content with the colour blue, and similarities with lime inexperienced. Scroll via, and have a look at the textual content. For those who’re sad with variations, click on the arrow icon above the “diff” and permit Meld to vary it.
Once you’re glad with the modifications you’ve made with Meld, click on the “save” button.
Use Meld To Compare Directories
Apart from checking numerous recordsdata for variations in textual content, Meld can discover variations in directories. Listing comparability is a helpful function for those who’re making an attempt to maintain two totally different folders the identical, however can’t inform if they’ve the identical contents.
To use this function, launch Meld, look to the start-up display screen, and click on the “directory comparison” button.

After choosing “directory comparison”, two packing containers with “none” will seem. Click on on each of the packing containers and use the menu to set the folders you’re making an attempt evaluate. When the folders are set, click on “compare”, and the Meld utility will immediately load each folders and spotlight the variations in each directories.
Copy Files/Folders
Want to repeat a file or folder from one aspect to the opposite? Scroll via the listing, choose a listing or file, and right-click on it. After right-clicking, click on on the “copy to” choice to maneuver the information.


