

On this tutorial, we’ll assist you to with how to show or remove crop marks in Microsoft Word. Typically, you may need seen diagonally V-shaped traces on the highest, left, backside, and proper corners of your Word doc and questioning what are they. These traces are referred to as crop marks. And, if you do not need to show them in your Word doc, then MS Word supplies a local choice to remove or cover crop marks. We are going to assist you to with that with step-by-step directions.
What are Crop Marks in Word?
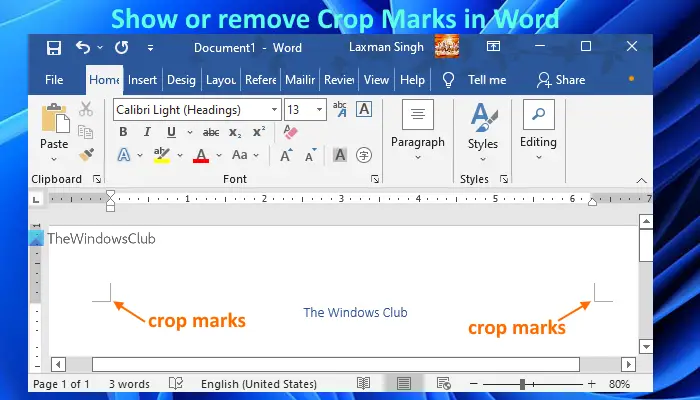
Crop marks in Microsoft Word, also referred to as trim marks, are the traces which might be printed in all 4 corners of your Word doc. These traces assist the printers to discover precisely the place to reduce the paper. These can come in helpful for instance while you need to create a brochure or card, then crop marks shall be useful whereas printing it.
Show or remove Crop Marks in Word


To show or remove crop marks in Microsoft Word, you want to observe these steps:
- Open a doc in MS Word
- Click on on the File menu current on the highest left nook
- Click on on the Choices obtainable on the underside left part
- A Word Choices window will pop up.
- In that window, go to the Superior choice current on the left aspect (simply above the Accessibility choice)
- Scroll down the web page till you entry the Show doc content material part
- There you will note the Show crop marks choice. Uncheck its checkbox if you’d like to remove crop marks
- If you would like to show crop marks in your Word doc, then you definitely want to choose its checkbox
- Press the OK button.
Now based mostly in your choice, crop marks will show or cover in your Word doc.
Additionally learn: How to transfer a Image freely in Microsoft Word.
How do I show crop marks in Word?
To show crop marks in a Microsoft Word doc on Home windows 11/10 pc, you want to entry the Word Choices window. That may be performed by accessing the File menu after which utilizing the Choices part. Upon getting opened the Word Choices window, search for the Superior choice there, and click on on it. After doing that, simply scroll down the listing of accessible sections and choices till you discover the Show doc content material part. Beneath that part, tick mark the Show crop marks choice. And at last, simply hit the OK button. That’s all! You’ll begin seeing crop marks in your Microsoft Word doc.
How do I eliminate crop marks in Word?
Whether or not you need to eliminate crop marks in Word 2021, 2019, Word 2016, or different variations of Microsoft Word, the steps are the identical. What you want to do is open a Word doc and entry Choices beneath the File menu. That may open the Word Choices window. There, click on on the Superior choice to entry obtainable sections current on the right-hand half. Now, scroll down these sections. Whenever you see the Show doc content material part, uncheck the field obtainable for Show crop marks. When it’s performed, click on on the OK button, and also you received’t see crop marks once more in your Word doc.
Learn subsequent: How to show and modify Desk Properties in Microsoft Word.


