

The ProtonMail Bridge permits Linux customers to use their ProtonMail account with conventional e-mail accounts. Even ones that don’t assist ProtonMail, or it’s subtle encryption options by default.
Setting up the ProtonMail Bridge on Linux is difficult for brand spanking new Linux customers, however not unimaginable. When you’re a fan of ProtonMail and wish to use your account on your favourite Linux e-mail app, comply with together with this information to get it working!
Observe: utilizing the ProtonMail bridge requires a paid account. To improve your account, click on here.
Putting in the ProtonMail Bridge app on Linux
On the official ProtonMail web site, it states that there’s a model for Microsoft Home windows, Apple MacOS, and Linux. Nonetheless, the Linux button is greyed out and unclickable. Whenever you hover over it, it says to “email for details,” and it’s marked as a beta utility.
Whereas it’s true that the builders of ProtonMail Bridge don’t make it straightforward to obtain the app from their web site, there’s no want to contact ProtonMail to get your fingers on the newest model of the Bridge app. Why? Somebody has positioned the program in the Flatpak app retailer, and it really works fairly properly!
Observe: if you don’t like Flatpak and would favor one other manner to set up and use the ProtonMail Bridge utility on your system, your finest guess is to contact ProtonMail. Ask them about collaborating in the Linux beta! The contact info is situated on this page.
To begin the set up of the ProtonMail Bridge utility on your Linux PC, begin by launching a terminal window on the Linux desktop. Press Ctrl + Alt + T or Ctrl + Shift + T on the keyboard.
As soon as the terminal window is open, set up the “flatpak” package deal on your Linux system together with your laptop’s package deal supervisor. Or, comply with our information to find out how to set up it on numerous Linux distributions.
When the “flatpak” package deal is put in, the Flatpak runtime is prepared to go. The following step is to add the Flathub app retailer to your Linux PC. To do this, use the flatpak remote-add command down under.
flatpak remote-add --if-not-exists flathub
After including the Flathub app retailer to your Linux PC, use the flatpak set up command under to set up the ProtonMail Bridge program. Take into account that if you run this command, the Flatpak runtime will even set up numerous dependencies and instruments that the app wants to perform accurately.
flatpak set up flathub ch.protonmail.protonmail-bridge
Assuming the flatpak set up command runs efficiently, you’ll have the newest model of the ProtonMail Bridge app set up on your Linux PC. Now, open it up by trying to find “ProtonMail Bridge” in the app menu, or by working the following flatpak run command down under in a terminal window.
flatpak run ch.protonmail.protonmail-bridge
Set up the ProtonMail Bridge
Begin the ProtonMail Bridge setup course of by launching the app (when you haven’t already.) When the program is open, comply with the step-by-step directions outlined under to get it working.


Step 1: Step one in setting up ProtonMail is putting in a suitable e-mail account. As of now, the finest e-mail app that works with ProtonMail Bridge is Mozilla Thunderbird. Comply with this tutorial to set up the newest Thunderbird if you don’t have already got it put in.
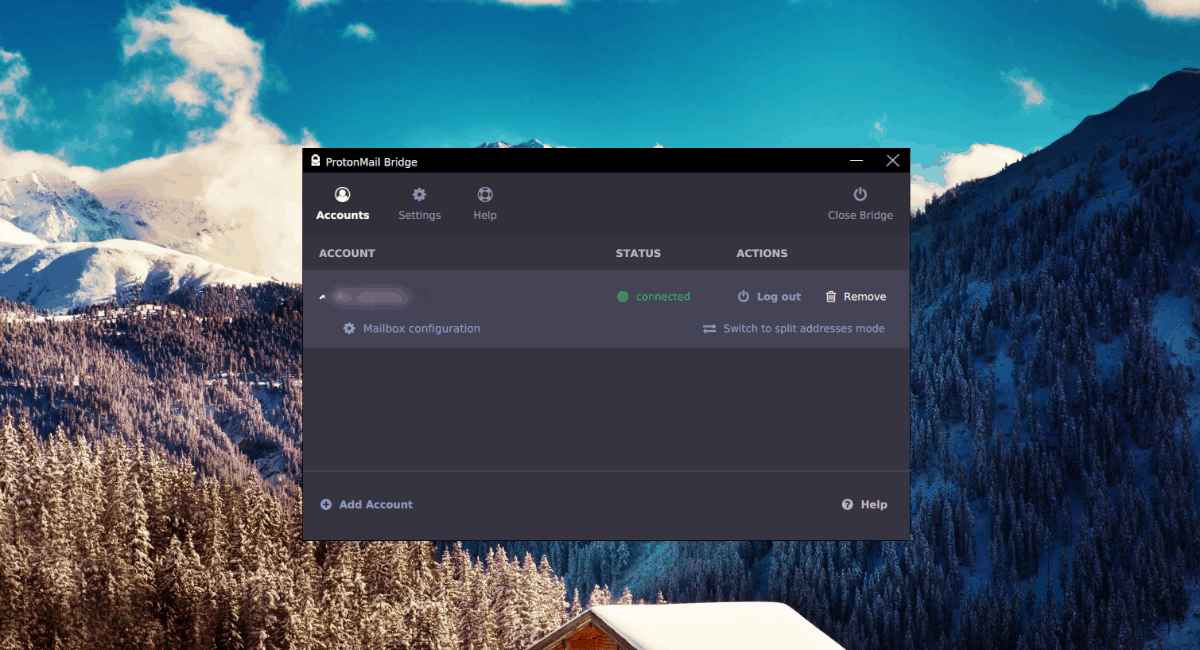
Step 2: Go to the ProtonMail Bridge and log in together with your account and password. Then, find the “Mailbox configuration” button and click on it. It is going to offer you the appropriate configurations for Thunderbird.


Step 3: Launch Thunderbird on your PC. When it begins up, the new account wizard will seem. Enter your ProtonMail e-mail tackle into the “Email address” field.
Step 4: Find the “Password” field and duplicate the password from the ProtonMail Bridge mailbox configuration window. Ensure to examine the field subsequent to “Remember password” so that you just don’t have to re-enter the password every time Thunderbird is opened.
Step 5: Discover the “Manual config” button and click on on it. Deciding on this button will reveal superior configuration choices for Thunderbird.


Fill out all of the textual content packing containers in the Thunderbird with the info from each the IMAP and SMTP settings in the ProtonMail Bridge mailbox configuration window. All passwords should be set to “Normal password.”
Step 6: Discover the “re-test” button at the backside of the account creation window and click on it. It is going to take a look at the connection settings you could have added to Thunderbird and assess if the info is appropriate.
Step 7: Find the “Advanced config” button at the bottom-left part of the account creation window and click on on it. Deciding on the “Advanced config” button will drive Thunderbird to settle for ProtonMail Bridge’s distinctive account settings.
Step 8: When the “Advanced config” window seems, don’t change something, as your info is already entered. As an alternative, choose the “OK” button to affirm the account info is appropriate to add your ProtonMail account info to Thunderbird.

Step 9: Upon including your ProtonMail account to Thunderbird, you will notice a pop-up window seem. This pop-up window says, “Add Security Exception.” Choose the “Confirm Security Exception” button.


Please word that there isn’t any precise safety concern. The tackle in Thunderbird (127.0.0.1) is the localhost, which is your laptop, working the encrypted ProtonMail Bridge app.
You will want to affirm a safety exception twice. One for 127.0.0.1, and one for 127.0.0.1:1025. Take into account that the 127.0.0.1:1025 safety exception immediate could not seem till you try to ship an e-mail.


After confirming each safety exceptions, your ProtonMail messages will load into Thunderbird. Get pleasure from!


