

Organising Ubuntu with your favourite packages may be tedious. You’ve gotten to search with the terminal for every software. As an alternative, think about making a “post-installation” script. A shell script you may run proper after a brand new set up of Ubuntu that can mechanically set up all packages with no effort.
Word: not utilizing Ubuntu however utilizing an Ubuntu-like working system comparable to Linux Mint, Elementary OS, Zorin OS, or others? This post-installation script information will work simply high quality on your OS as properly!

Including the shebang
Step one of writing a Bash script is to add in what’s referred to as a “shebang.” In computing phrases, a “shebang” is a mechanism that may inform the Bash terminal what program it ought to use to run the script. Examples of shebangs embody #!/bin/bash, #!/bin/sh, and #!/usr/bin/env.
In shell scripts, the most typical shebang to use is the #!/bin/bash, as scripts are often run with the bash command. Nonetheless, utilizing #!/bin/sh can be acceptable. In our post-installation script, we shall be utilizing the most typical shebang (#!/bin/bash).
So as to add the shebang to your Ubuntu post-installation script, you need to first create the script file. To try this, use the contact command beneath.
contact ubuntu-post-installer.sh
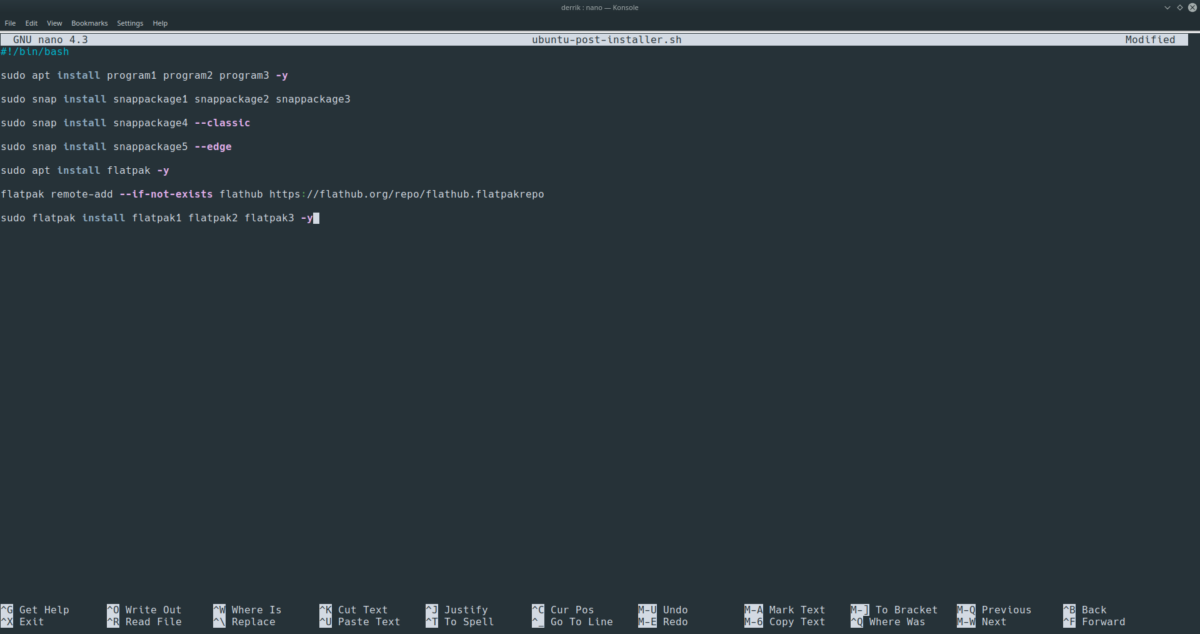
After creating the ubuntu-post-installer.sh file on your Ubuntu PC, it’s time to open up the file for modifying within the Nano textual content editor. Utilizing the command beneath, begin modifying.
nano -w ubuntu-post-installer.sh
Within the Nano textual content editor, write within the Bash shebang on the prime of the file. Don’t create any areas! It have to be the very first line.
#!/bin/bash
Following the shebang, press the Enter key to create a brand new line within the file, and transfer on to the subsequent part of the information.
Step 1 – Robotically putting in packages from Apt
The factor that the majority Ubuntu customers are going to need to add to their post-installation script is a line of code that can mechanically set up all of their most-used packages. Issues just like the Gimp picture editor, possibly the Chromium net browser, the Steam gaming retailer, the Telegram chat app, and extra.
So as to add your “automatic” Apt installer line of code, go to the Nano textual content editor and add the next line beneath. Be certain to change “program1 program2 program3” with the precise names of the packages you propose to have your script mechanically set up.
Word: you need to specify the precise bundle names of every app for it to work with the automated installer. Should you can’t keep in mind the title of a program you want to to add to the road of code, seek for the bundle with apt search programname.
sudo apt set up program1 program2 program3 -yAfter writing out your automated Apt set up line into the script, press the Enter key to create a brand new line. Then, save your edits thus far by urgent Ctrl + O. As soon as all edits are saved, transfer on to the subsequent part of the information.
Step 2 – Robotically putting in packages from the Snap Retailer


A number of mainstream apps that Ubuntu customers set up are discovered within the Snap retailer. Should you rely rather a lot on Snap apps, it’s your decision to write in a line of code in your script that can maintain all Snaps on your system.
To begin the method, head over to the Snap Retailer web site, and use the search perform to find the apps you want to to set up mechanically.
If you discover an app within the Snaps, click on the “install” button to discover the title of the bundle. Take into account that if you would like to set up apps which have “–classic” or “–edge,” they’ll want to be separate set up instructions within the script.
When you’ve received the names of the entire Snap packages, write the code beneath into the script. Please keep in mind that “snappackage1 snappackage2 snappackage3” is an instance. You have to to substitute it for the script to perform efficiently.
sudo snap set up snappackage1 snappackage2 snappackage3Achieved including the Snap line of code to your script? Press Ctrl + O to save the edits. Then, press Enter to make a brand new line and transfer to the subsequent part of the information.
Step 3 – Robotically putting in Flatpak apps


Not a whole lot of Ubuntu customers use Flatpak, as Snap packages are prepared to exit of the field. Nonetheless, in case you are one of many Ubuntu customers that depend on Flatpaks, you may simply add it to the post-installation script to make issues simpler.
To begin the method, you need to have the Flatpak runtime put in. To get your script to set up Flatpak out of the field, enter the code beneath.
sudo apt set up flatpak -y
Following the Flatpak set up line, you need to have your script subscribe to the Flathub app retailer. Press Enter on the important thing and add the code beneath to the script.
flatpak remote-add --if-not-exists flathub After including the Flathub line of code, it’s time to work on the Flatpak automated set up command. First, run the flatpak search command and discover the names of every bundle you’d like to set up.
If you’ve received the names of all Flatpak apps, press the Enter key, and add within the set up command. Take into account that “flatpak1 flatpak2 flatpak3” is an instance. You have to to change it to the precise names of the Flatpak packages.


sudo flatpak set up flatpak1 flatpak2 flatpak3 -yAs soon as the Flatpak set up line is within the script, press Ctrl + O to save the edits, then, press Ctrl + X to exit Nano, as modifying is full!
Operating the script
To run your Ubuntu post-installation script, comply with the step-by-step directions beneath.
Step 1: Place the script into the house listing of any new Ubuntu set up.
Step 2: Open up a terminal window on Ubuntu by urgent Ctrl + Alt + T or Ctrl + Shift + T on the keyboard. Then, replace the permissions of the script with the chmod command.
sudo chmod +x ~/ubuntu-post-installer.sh
Step 3: Run the script on your contemporary Ubuntu Linux PC with the bash command.
sudo bash ubuntu-post-installer.sh


