

Wish to host a Minecraft server on Linux? In that case, it’s essential be working the Java version, as Microsoft solely permits Linux Minecraft servers to run that approach. To run a Minecraft server on Linux, you’ll want the Java Runtime atmosphere.platform with the Java version. Putting in Java is perhaps annoying. Nevertheless, it’s easy to put in Java on Linux, so let’s get going!
Set up Java Runtime
On this information, we’ll concentrate on the idea of internet hosting a Minecraft server on a Linux working system. We received’t particularly concentrate on utilizing a Linux server working system, as a result of it’s not required. Nevertheless, should you’re seeking to have a devoted Minecraft server on Linux, it’s best to in all probability go that route, and we advocate Ubuntu server.
Observe: there are numerous variations of the Java Runtime atmosphere on Linux, each Oracle’s official launch and the open supply various. For this tutorial, we’ll use the official Oracle model. That stated, it’s completely OK to make use of the OpenJDK setup in its place, and every little thing ought to run simply as effectively.
Ubuntu/Ubuntu Server
Oracle’s Java runtime isn’t straightforward to put in on Ubuntu. Nevertheless, including a PPA makes this a lot much less of a headache. As a result of nature of how Ubuntu server works, this PPA ought to work high quality on each Ubuntu desktop, and Ubuntu server. Nevertheless, should you add the PPA to Ubuntu server and discover points, consider installing the OpenJDK JRE runtime as an alternative.
To add the Oracle Java Runtime PPA to your system, open up a terminal and enter the next:
sudo add-apt-repository ppa:webupd8team/java
Run apt replace to refresh Ubuntu’s software program sources.
sudo apt replace
After working the replace, use apt improve to put in any updates that present up.
sudo apt improve -y
Lastly, set up Oracle Java from the software program repository.
sudo apt set up oracle-java9-installer

sudo apt set up oracle-java9-set-default
Debian/Debian Server
Debian can entry the Ubuntu Oracle Java PPA. To add it, you’ll must edit your /and many others/apt/sources.checklist file. Open up a terminal and launch Nano.
Oracle Java not working? Consider using the Open source alternative instead.
sudo nano /and many others/apt/sources.checklist
Paste the next code into the Nano editor:
#Webupd8
deb  trusty most important
deb-src  trusty most important
Save the Nano editor with Ctrl + O, then use the terminal so as to add the PPA’s software program GPG key.
sudo apt-key adv --keyserver hkp://keyserver.ubuntu.com:80 --recv-keys EEA14886

sudo apt-get replace
Lastly, set up Java.
sudo apt-get set up oracle-java9-installer

sudo apt-get set up oracle-java9-set-default

echo oracle-java9-installer shared/accepted-oracle-license-v1-1 choose true | sudo /usr/bin/debconf-set-selections
Rhel/Fedora/OpenSUSE
Oracle has fairly good assist for all Redhat based mostly Linux working techniques, so putting in it is extremely straightforward. That stated, if in case you have points, you could wish to look into the open source alternative.
To set up the newest model of the Oracle Java Runtime Setting, go to the download page and get the newest RPM.
As soon as downloaded, open up the terminal, CD to the ~/Downloads listing and run the installer.
Fedora/Rhel
sudo dnf jre-8u171-linux-x64.rpm
or
sudo yum jre-8u171-linux-x64.rpm
Suse
sudo zypper jre-8u171-linux-x64.rpm
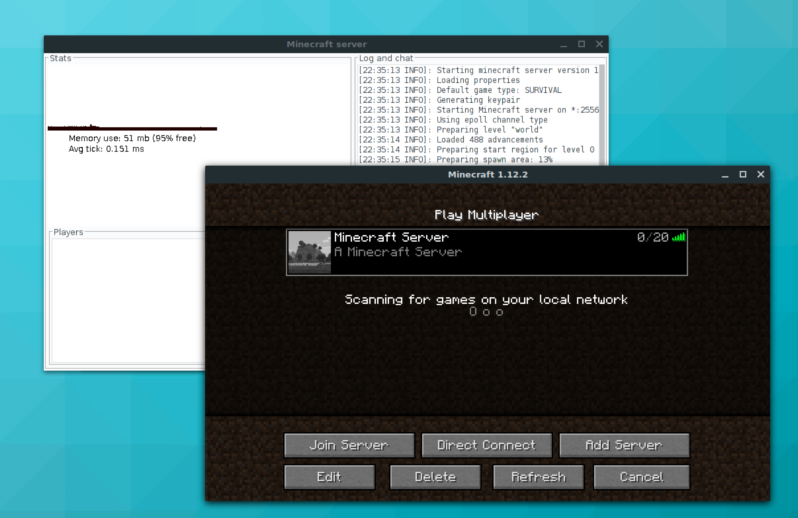
Run Minecraft Java Version Server
After getting Java working, the onerous half is finished. Now all that’s left to do is to obtain the newest model of the Minecraft Java Edition server app and run it. When downloaded, open up a terminal use the MV command to position the server app in an acceptable location.


Observe: in case you are utilizing a server OS, you could must obtain and place the file manually. The directions under are particularly for these working a Minecraft server on an OS that has a correct Dwelling folder construction arrange.
mkdir ~/Minecraft/server/

mv ~/Downloads/server.jar ~/Minecraft/server/
Run the server headless (no GUI) with:
java -Xmx1024M -Xms1024M -jar ~/Minecraft/server/server.jar nogui
Alternatively, run the Minecraft server with a GUI interface:
java -Xmx1024M -Xms1024M -jar ~/Minecraft/server/server.jar
Now that the Minecraft Java version server is working, you’ll must distribute the IP tackle for it. For greatest outcomes, host this server at your personal dwelling on LAN. Should you should host one on-line, think about doing it on a VPS like DigitalOcean, as they provide nice charges to run Linux apps on.
Observe: in case you are working a web-based server, make certain that port 25565 is forwarded or the server won’t work!
To discover the native IP tackle, run in a terminal:
ip addr present | grep 192.168.1
This command will isolate the server’s LAN IP.
From there, distribute your IP tackle to any who wants to attach and instruct gamers so as to add the IP to their Minecraft shopper.


Operating your Minecraft server on-line and never simply on LAN? You’ll must undergo and discover your server’s exterior IP tackle. Discovering this tackle needs to be straightforward to do inside most VPS dashboards.


