

Do you’ve some video footage that you just want to make some cuts to? Not sure about how to make cuts in footage on Linux? We will help! Comply with alongside as we present you ways to use Kdenlive to cut video footage on Linux!

Putting in Kdenlive on Linux
Earlier than we will show how to cut video footage in the Kdenlive video editor, we’d like to go over how to set up the video editor on Linux, because it doesn’t come pre-installed on many Linux working programs.
To start out the set up of the Kdenlive video editor, open up a terminal window. Launch a terminal by urgent Ctrl + Alt + T or Ctrl + Shift + T on the keyboard. As soon as the terminal window is open and prepared to go, comply with the set up directions beneath that corresponds together with your distribution.
Ubuntu
These on Ubuntu Linux will probably be ready to get the Kdenlive video editor up and operating with the Apt bundle administration command beneath.
sudo apt set up kdenlive
Debian
There’s an older model of the Kdelive video editor accessible for Debian Linux in the “Main” software program repository. Although, hold in thoughts that you could be be lacking out on newer options by putting in it in this fashion, as Debian takes longer to replace software program than different distros. To put in it, use the next Apt-get command.
sudo apt-get set up kdenlive
Need a extra up to date model of Kdelive on your Debian PC? Think about following the Flatpak or Snap set up directions as a substitute.
Arch Linux
On Arch Linux, get the most recent Kdelive video editor put in with the next Pacman command.
sudo pacman -S kdenlive
Fedora
To get the most recent model of Kdelive working on Fedora Linux, it’s essential to use the next Dnf command in a terminal window.
sudo dnf set up kdenlive
OpenSUSE
On OpenSUSE, you’ll find a way to set up a comparatively latest model of the Kdenlive video editor by getting into the next Zypper command right into a terminal.
sudo zypper set up kdelive
Maintain in thoughts that some releases of OpenSUSE (LEAP) have older variations of Kdelive accessible. In case you are lacking new options, contemplate following the Flatpak or Snap set up directions as a substitute.
Flatpak
Kdenlive is on the market on the Flatpak Flathub retailer. To get it working on your system, begin by enabling the Flatpak runtime on your system. Then, use the instructions beneath to set up the software program.
flatpak remote-add --if-not-exists flathub

flatpak set up flathub org.kde.kdenlive
Snap
The Kdenlive video editor is on the Snap bundle retailer. So, in case you’re operating a Linux working system that has help for Snaps, you’ll find a way to get the app working fairly rapidly.
Observe: it’s essential to have the Snapd runtime put in and operating on your Linux PC to set up Snap packages from the Snap retailer. For extra data on how to arrange Snapd, click on right here.
After enabling the Snapd runtime on your Linux PC, use the snap set up command to get the most recent Kdenlive.
sudo snap set up kdenlive
Cut video footage in Kdenlive
Now that the app is put in on your Linux PC launch, Kdenlive on the Linux desktop. Then, discover the “New” button and click on it to create a brand new venture.
Upon clicking the “New” button, a venture selector will seem on the display. Look by means of and choose the video profile that finest matches the video clip you’d like to cut. Then, click on “OK” to affirm. When you’ve arrange your new venture, click on “File” adopted by “Save As” and save your venture.


Along with your Kdenlive video venture saved, comply with the step-by-step directions beneath to learn the way to cut footage.
Step 1: Discover the “Project” menu and click on on it with the mouse. Then, choose the “Add Clip or Folder” button to import footage to the Kdenlive editor.


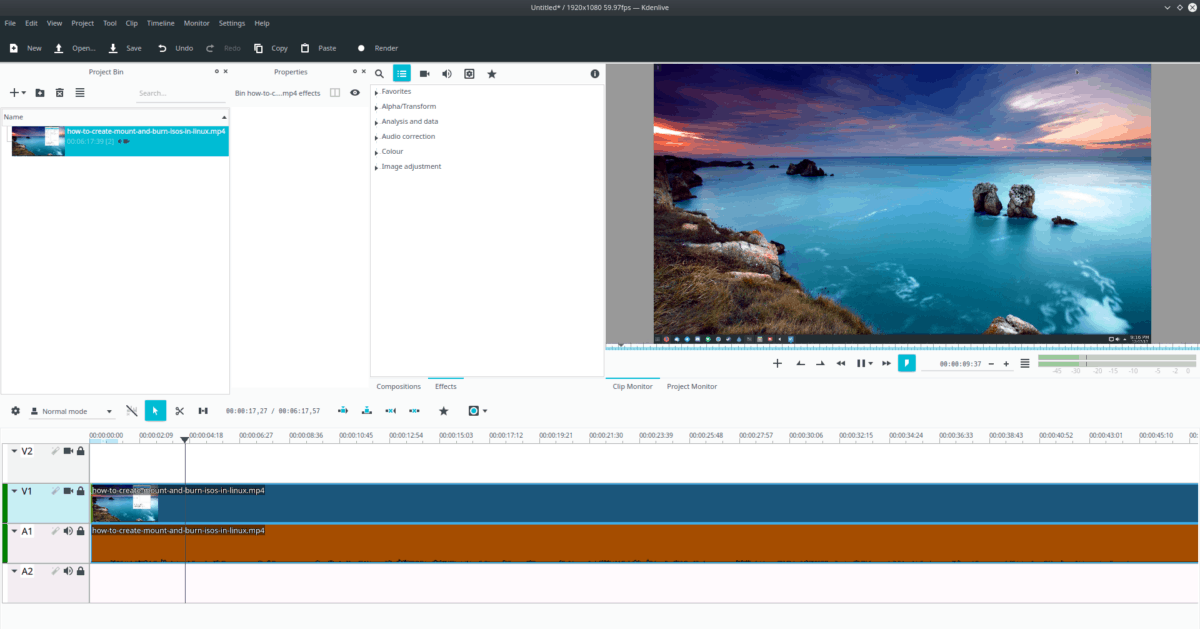
Step 2: After importing your footage to Kdenlive, it’s going to seem in the “Project Bin.” Click on on the clip you would like to cut with the mouse and drag it to the timeline. For finest outcomes, drag it to V1 (Video 1).


Step 3: Click on on the clip in the timeline with the mouse. Then, press the Spacebar to begin playback of the clip in the “Project Monitor.”


Step 4: Watch by means of your clip in the Kdenlive “Project Monitor” until you get to the half that you just’d like to cut. Then, press the Spacebar button once more to pause the footage.
Step 5: With the clip playback paused, click on on the scissor icon to swap to the “Cut” mode in the Kdenlive video editor. Then, click on on the paused spot with the mouse to cut the footage. Repeat steps 3-5 for cuts that should be made in the footage.


Step 6: After you’ve completed chopping your footage in Kdenlive, click on on the mouse icon to exit the “Cut” mode. Then, click on on the clip you cut and press Delete to take away the cut footage from the timeline.
Step 7: If you delete a cut clip from the venture, there will probably be a spot in the Kdenlive timeline. Drag the remaining footage that was not cut along with the mouse to do away with the hole.


Carried out deleting clips from the Kdenlive timeline? Press Ctrl + S to save the edits made.
Step 8: As soon as the venture file is saved, you’re prepared to render out the footage as a video file. Find the “Render” button on the high of the Editor and click on it to entry the rendering settings for Kdenlive.
Step 9: Within the “Rendering” window, choose the kind of file you’d like to output your footage. Then, click on the “Render to File” button to begin rendering your newly cut footage.


When the rendering course of is full, your newly cut video footage will probably be in the “Videos” folder in the house listing.


