

The Gimp Graphics editor, although not excellent, is certainly one of the greatest open-source functions out there to Linux customers. Nonetheless, the default format of the app is sort of horrible. The toolbars are in three components and exhausting to use; the theme it makes use of by default doesn’t match your system’s one, and so on.
Fortunately, Gimp has a major variety of customization options which might be certain to excite Linux customers. So, on this information, we’ll go over how to customize the Gimp interface on Linux. We’ll present you the way to tweak all the things from the toolbar, the icons it makes use of, theming, and way more!
Conceal docks
In Gimp, “docks” are the objects to the left and proper of the workspace. In the left dock, you’ll see your toolbox, full of varied graphical instruments you should utilize to manipulate the picture you’re at present working on. In the proper dock, you’ll see the layer UI, brush choices, picture pathing choices, textures, and way more.
These docks are very helpful when working with Gimp. Nonetheless, you might discover that they get in the method from time to time, and take up plenty of area. In case you’re working on a picture in Gimp and need to eliminate the docks, right here’s what to do.
Click on “Windows” in the Gimp UI to reveal the “Windows” menu. Then, in the menu, discover the “Hide docks.” button, and examine the field subsequent to it to disguise each the left and proper Gimp immediately docks.


Want to unhide the docks? Return to “Windows,” and uncheck the “Hide docks” button, or press Tab.
Single-window mode
For the longest time, Gimp has had a bizarre UI that was exhausting to work with. The left and proper dock and the picture workspace floated independently. As of late, in new variations, that subject is taken care of with the “Single-window” mode, which supplies the customers an expertise comparable to Adobe Photoshop.


In case you’re nonetheless caught in multi-window mode in Gimp, you possibly can change to Single-window mode by clicking on the “Windows” menu, then checking the field subsequent to “Single-window mode.”


Want to exit Single-window mode in Gimp? Return to “Windows” and uncheck the field subsequent to “Single-window mode.”
Tab place
The default tab place in the Gimp software is at the prime. For many customers, this works simply tremendous. Nonetheless, in case you’re not a fan of the positioning, for no matter motive, the app enables you to customize it and alter it to wherever you’d like.
To alter the place of the tabs in Gimp, do the following. First, open up the “Windows” menu. Then, inside the “Windows” menu, search for a sub-menu labeled “Tab position.”


In the “Tab position” menu, you will note a number of completely different decisions for the place you’d like the Gimp app to show tabs (prime, backside, left, proper). Choose certainly one of the choices in the checklist to change the tab place immediately.
Toolbox objects
The Gimp software’s toolbox objects may be custom-made to have extra (or much less) instruments out there to use. To customize the Gimp toolbox, do the following.
First, click on the “Edit” button at the prime of Gimp and entry the Edit menu. Then, look by way of for the “Preferences” button and click on it to open up Gimp’s preferences space.
Within Gimp’s preferences window, discover the “Interface” part. Then, look beneath it for “Toolbox” and click on on it to entry Gimp’s toolbox settings.
In the toolbox settings, look by way of the checklist of instruments enabled in Gimp. Click on the eye button to allow/disable instruments in the toolbox.

If you’ve completed including/eradicating instruments to the Gimp toolbox, click on the “OK” button to save adjustments.
Gimp icon type
Gimp’s default icon type is sort of frankly an eyesore. Fortunately, the icons in the app are very customizable, and it’s potential to change out the defaults for different ones.
To customize Gimp’s icon type, begin out by clicking on “Edit” to open the edit menu. Then, look by way of the menu, and choose “Preferences” to open up Gimp’s preferences space.
Within Gimp’s preferences space, search for the “Interface” column. Then, click on on “Icon Theme” to entry the Gimp icon settings.
In Gimp’s icon settings, you will note 4 completely different icon themes to select from. These icons are “Color”, “Legacy”, “Symbolic”, and “Symbolic-Inverted.” Select the theme that fits your wants greatest.

If you’ve set your most popular Gimp icon theme, click on “OK” to save the adjustments.
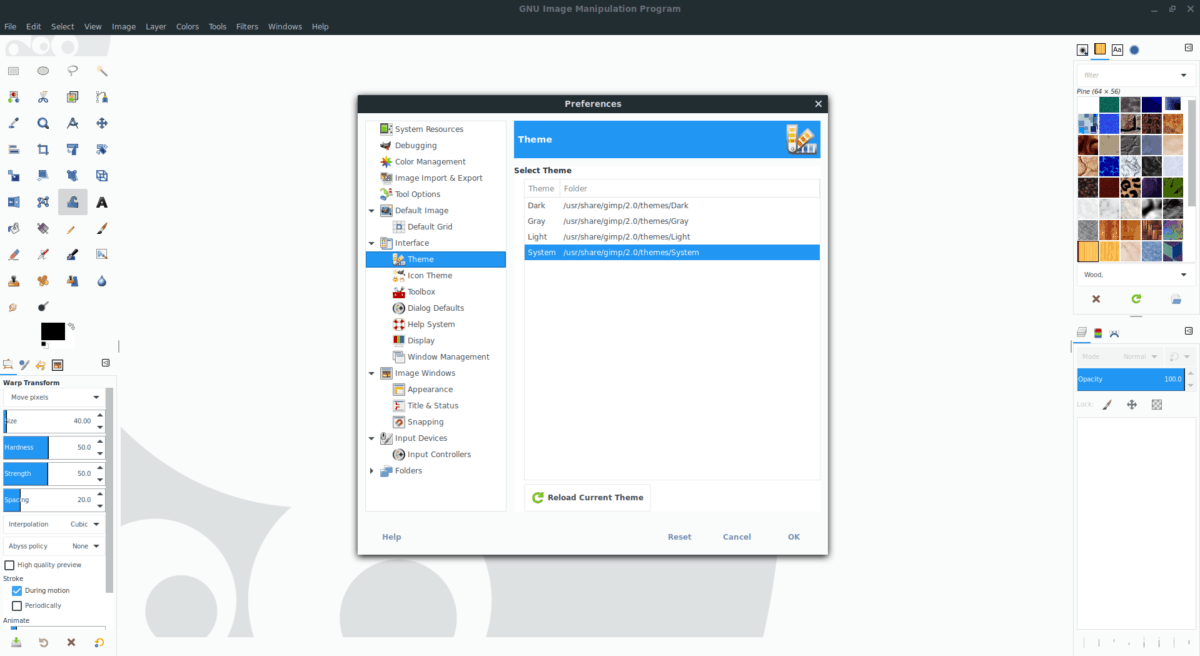
Gimp user-interface type
In case you’re not a fan of the Gimp consumer interface, you’ll be blissful to know you could customize it with completely different themes. To customize Gimp’s consumer interface type, do the following.
First, click on on “Edit” to open up the Edit menu. Then, look by way of the menu for “Preferences” and click on it to entry Gimp’s preferences space.
In the Gimp preferences space, discover “Interface” and click on it to entry Gimp’s interface settings. Then, beneath “Interface” click on on the “Theme” choice to entry the theme space.
Within the theme space, you may be offered with 4 completely different Gimp kinds. These kinds are “Dark,” “Gray”, “Light”, and “System”. Choose the theme you want greatest.


After deciding on your most popular theme, click on “OK” to immediately change Gimp over to the new theme.


